Build your own web server
2022 May 30
See all posts
Build your own web server
In this article we are going to build a Web-Server based on Debian (Linux) OS, using Apache2. We will also configure and secure the SSH access, so that we can securely access our server from a remote desktop.
I'm not gonna explain why you'd like to build an on-premise web server (Privacy! 🔔). You can of course always google it!
Let's get right into the how-to build it 🏗️!
Requirements:
- Have a dedicated machine (old laptop, raspberry pi, cloud instance, etc)
- A Pendrive (to boot and install the new OS)
Steps:
- Set up the operating system (Linux)
- Install and configure the webserver (Apache)
- Configure secure ssh access to your server
Set up the operating system
Overview
- Get iso image from the desired OS
- Burn image into Pendrive
- Boot system from the Pendrive
- Install new OS
You can use any Linux distro of preference for the OS, In this case I'll use Debian. It's well suited for web servers and it's relatively easy to get started with.
Similar options can be Ubuntu, Linux Mint, or for more experienced people Gentoo.
Start:
Download the Debian ISO image from the Debian official site: Debian .iso
Let's burn the ISO image into the Pendrive. You can use pendrivelinux.com to do this
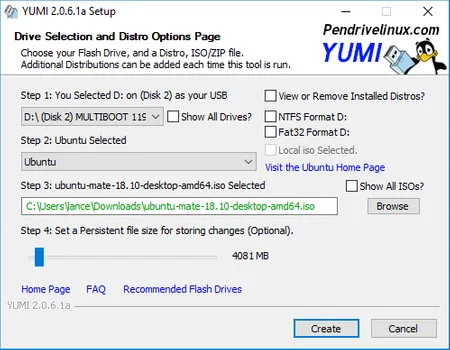
I'm using Ubuntu, thus I'll also add the steps on how to do it from Ubuntu itself: bootable-usb-from-ubuntu.
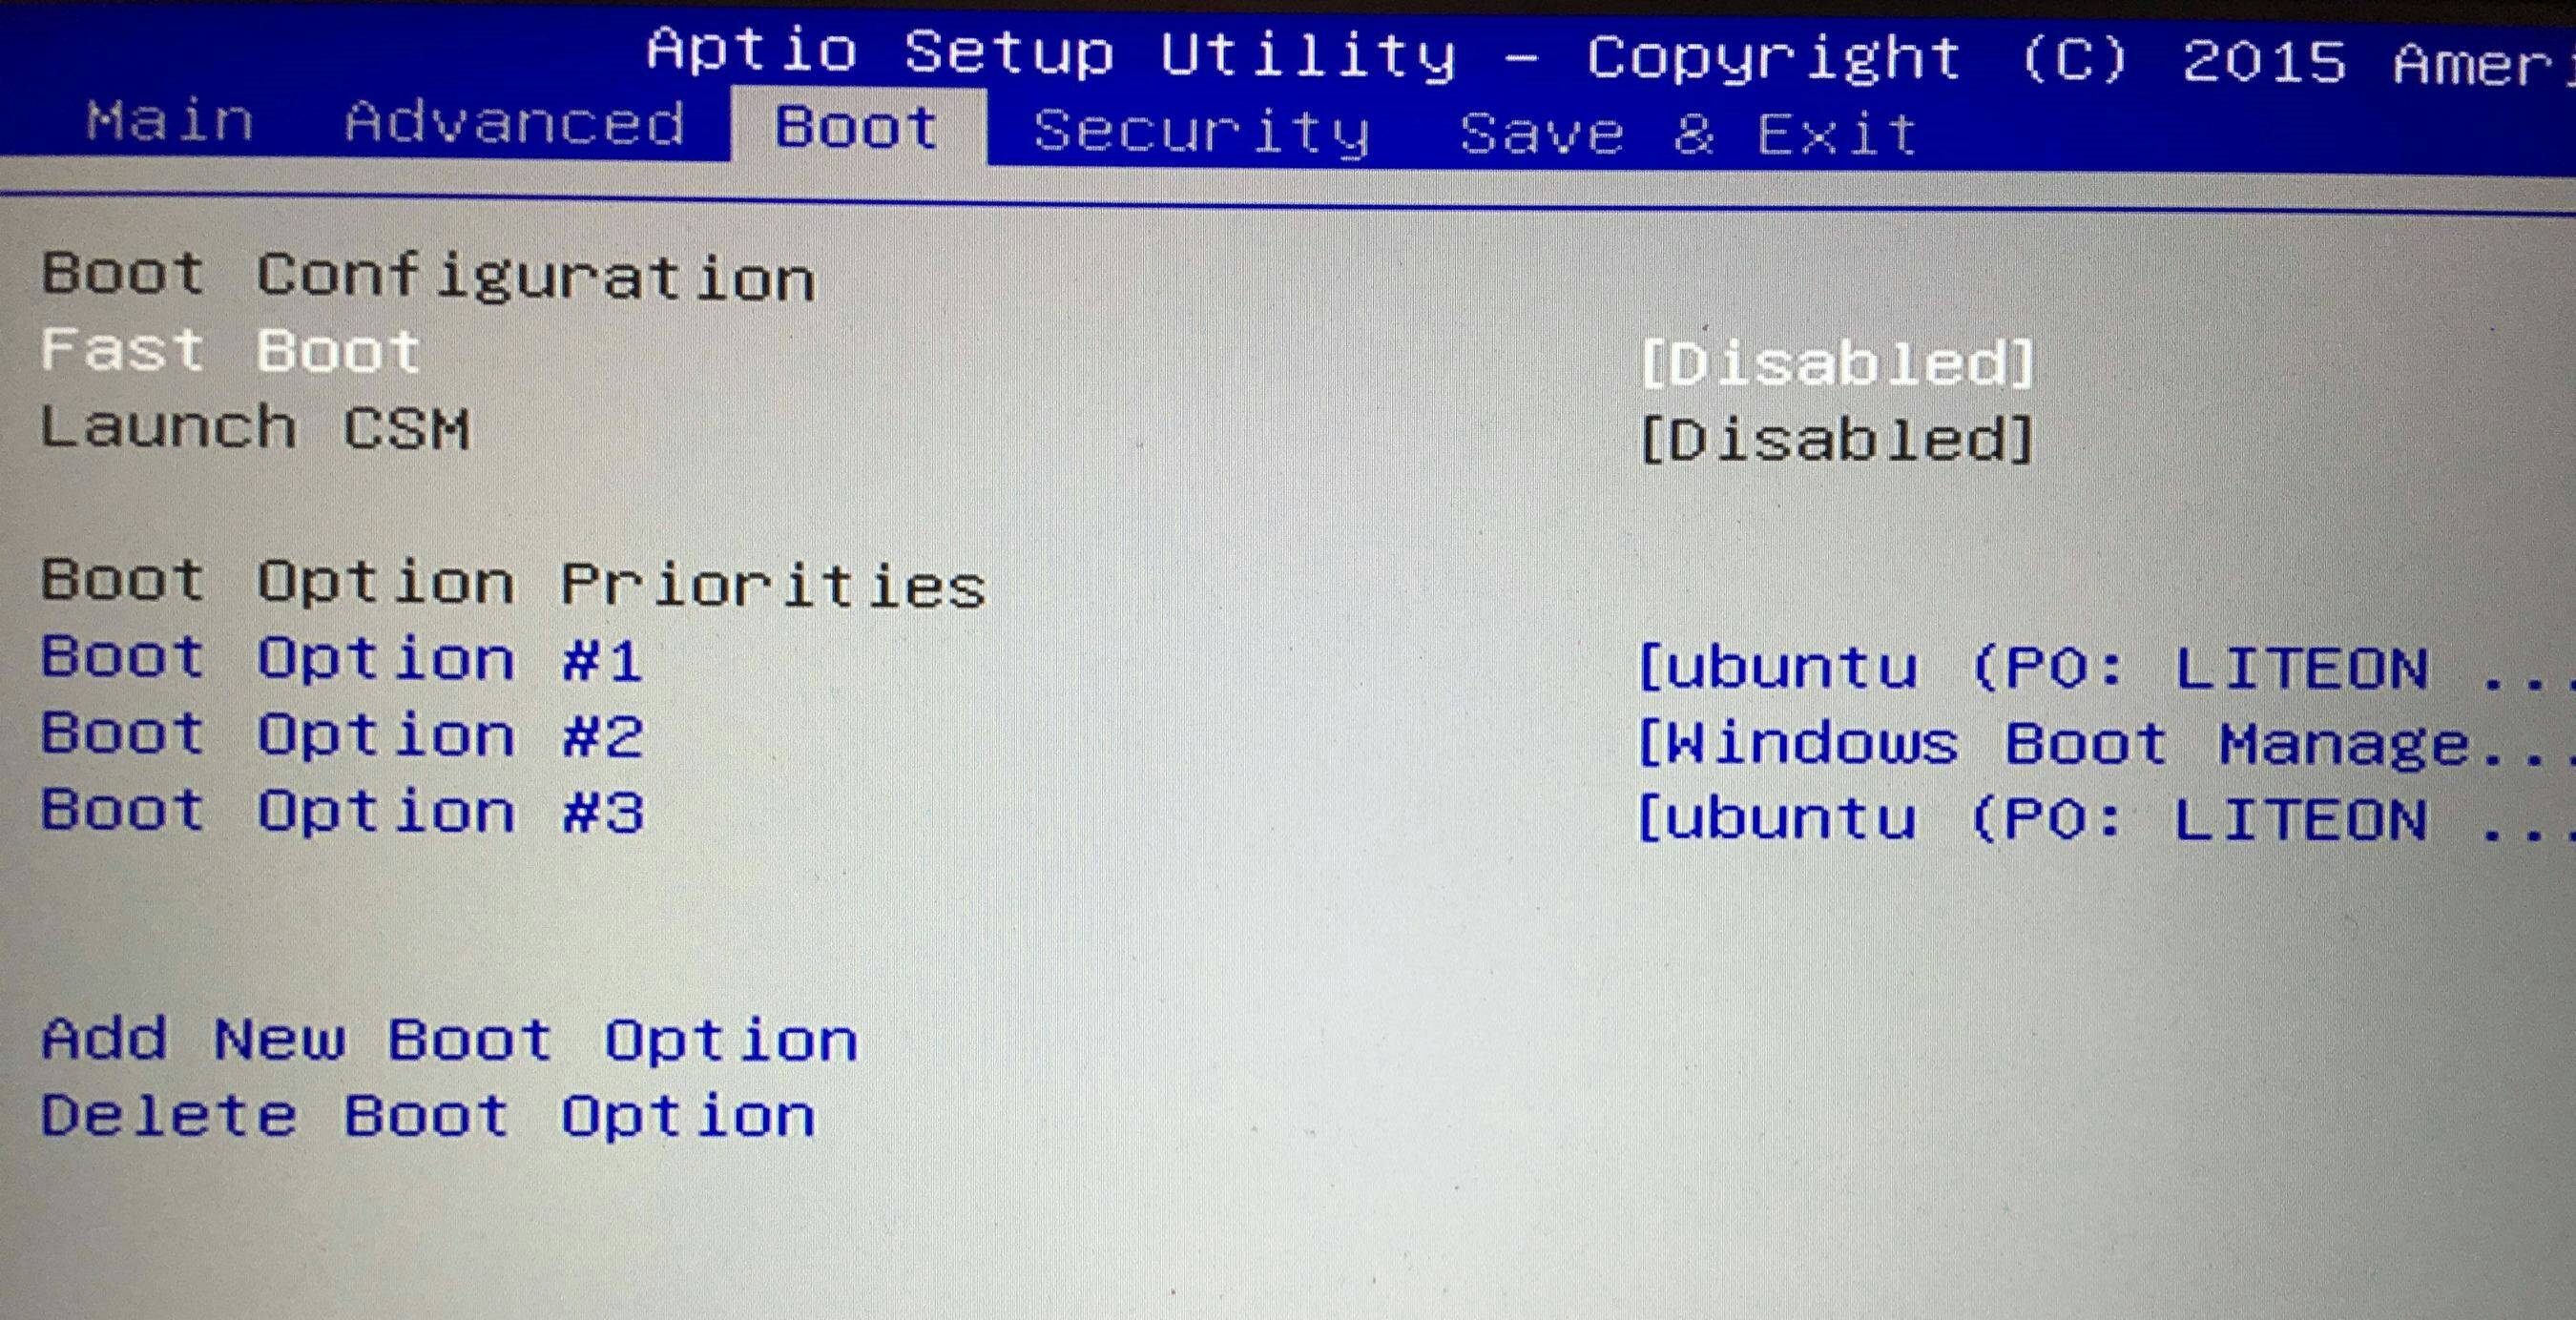
Boot from our Pendrive; First we need to enter BIOS setup.
– Restart your computer
– While the startup screen is loading, to enter BIOS; Press ESC, F8, F9, or Option (depending on the manufacturer)
– Navigate to "Boot" menu using the arrow keys and select your USB Disk as the Boot Option #1
– Press F10 to save and quit
Once your computer boots from USB, you'll go through the Debian installation process
Recommendations for installing Debian:
- Select Debian as Web-Server option and disable Desktop functionality (we only need web-server capabilities)
- Select "All files in one partition" (this is recommended for new users)
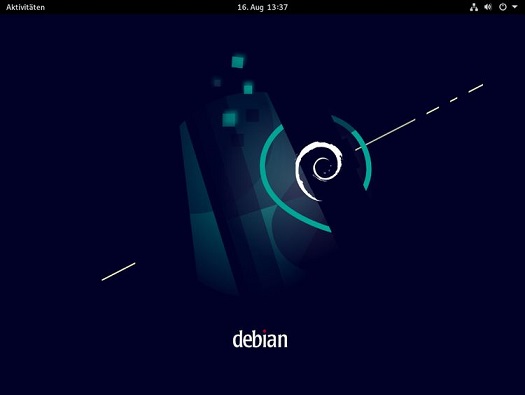
Congrats! You have now Debian OS up and running 🏃🏃♀️!
Overview
- Update system repositories
- Install Apache2
- Configure webserver
- Test web server
Let's start by updating the packages.
sudo apt update
–– If your account doesn't have sudo rights, switch to the root user by running su -
Install Apache2 by running
sudo apt install apache2
Verify installation by running
apache2 -version
sudo ufw allow 80/tcp # (default network port used to send and receive unencrypted web pages)

sudo ufw allow 443/tcp # (network port used to make secured and encrypted data - HTTPS)
Verify port settings
sudo ufw status
Verify Apache2 is active by running:
sudo systemctl status apache2
The response should similar to: 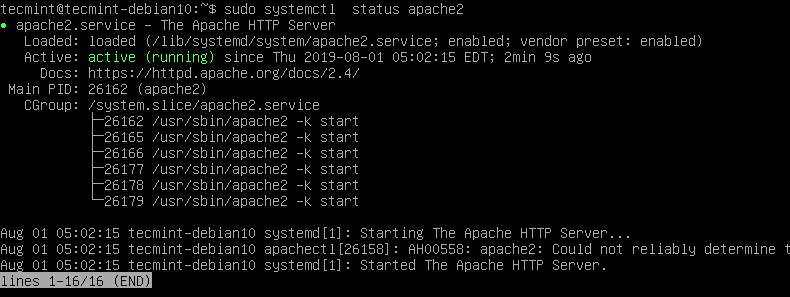
Credits to tecmint.com for the image
If the server is not running, you can start it by running:
sudo systemctl start apache2 **or** sudo systemctl restart apache2
Get your server IP address (hostname) by running:
hostname -I
Access your web server! 👌
Open the browser and navigate to http://your-server-IP-address (e.g. http://192.173.43.21)
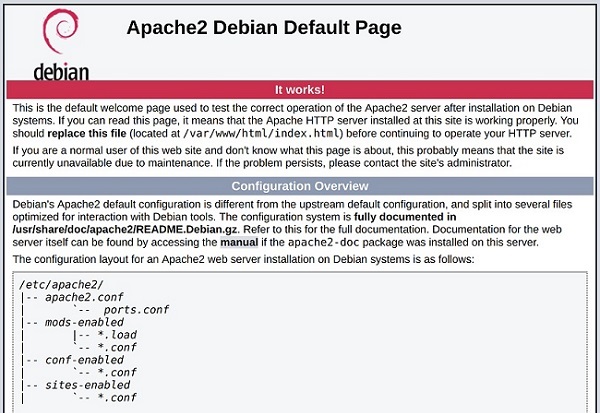
Congrats! You now have your own web server ✨!
#3 - Secure SSH access to manage your server
Overview
- Configure login access
- Create public keys to ssh into our server
I would like to ideally manage my server from a remote computer, thus let's configure it to have secure SSH access.
SSH Key access
It's recommended to enter your server by using SSH Keys instead of passwords since it's a more secure way to do so.
How to:
Switch to your local user profile that will be accessing the server
su username
— It's best practice neither to use root nor admin users
Generate a new key pair
ssh-keygen -t rsa
— It's recommended to add a catchphrase when generating the key since it adds an extra layer of security
Check that the public key was created successfully
ls ~/.ssh/id_*
Copy the key to your remote server
ssh-copy-id -i ~/.ssh/id_rsa.pub remote_username@your_server_ip_address
Validate that the key was added successfully
ssh remote_username@your_server_ip_address
SSH access configuration
Navigate to /etc/ssh/sshd_config and within the file:
Change 22 Port
Change port 22 to any non-default port: e.g. Port 20155
Disable Root logins
Set #PermitRootLogin as noPermitRootLogin no
Disable empty passwords
Set #PermitEmptyPasswords as PermitEmptyPasswords no
Enable Protocol 2
Add the line Protocol 2 to the file.
Limit for password attends
Set #MaxAuthTries to MaxAuthTries 3
or Disable password authentication altogether (Important -– Please make sure you already have SSH Key access before disabling it) — Set #PasswordAuthentication as PasswordAuthentication no
Now, restart SSH service to apply our changes
systemctl restart ssh
Let's finally test our changes!
SSH into your server using your keys
ssh remote_username@your_server_ip_address -p your_server_port_number
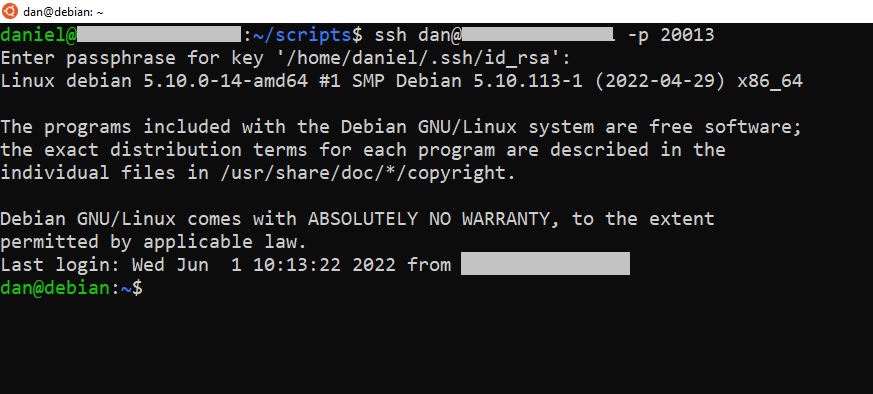
Woohoo! You can now SSH into your server 🔥 !
Build your own web server
2022 May 30 See all postsIn this article we are going to build a Web-Server based on Debian (Linux) OS, using Apache2. We will also configure and secure the SSH access, so that we can securely access our server from a remote desktop.
I'm not gonna explain why you'd like to build an on-premise web server (Privacy! 🔔). You can of course always google it!
Let's get right into the how-to build it 🏗️!
Requirements:
Steps:
Set up the operating system
Overview
You can use any Linux distro of preference for the OS, In this case I'll use Debian. It's well suited for web servers and it's relatively easy to get started with.
Similar options can be Ubuntu, Linux Mint, or for more experienced people Gentoo.
Start:
Download the Debian ISO image from the Debian official site: Debian .iso
Let's burn the ISO image into the Pendrive. You can use pendrivelinux.com to do this
I'm using Ubuntu, thus I'll also add the steps on how to do it from Ubuntu itself: bootable-usb-from-ubuntu.
Boot from our Pendrive; First we need to enter BIOS setup.
– Restart your computer
– While the startup screen is loading, to enter BIOS; Press ESC, F8, F9, or Option (depending on the manufacturer)
– Navigate to "Boot" menu using the arrow keys and select your USB Disk as the Boot Option #1
– Press F10 to save and quit
Once your computer boots from USB, you'll go through the Debian installation process
Recommendations for installing Debian:
Install and configure the webserver
Overview
Let's start by updating the packages.
–– If your account doesn't have sudo rights, switch to the root user by running
su -Install Apache2 by running
Verify installation by running
Configure the Firewall settings (if it's running in your system)
Verify port settings
Verify Apache2 is active by running:
The response should similar to:
Credits to tecmint.com for the image
If the server is not running, you can start it by running:
Get your server IP address (hostname) by running:
Access your web server! 👌
Open the browser and navigate to http://your-server-IP-address (e.g. http://192.173.43.21)
#3 - Secure SSH access to manage your server
Overview
I would like to ideally manage my server from a remote computer, thus let's configure it to have secure SSH access.
SSH Key access
It's recommended to enter your server by using SSH Keys instead of passwords since it's a more secure way to do so.
How to:
Switch to your local user profile that will be accessing the server
— It's best practice neither to use root nor admin users
Generate a new key pair
— It's recommended to add a catchphrase when generating the key since it adds an extra layer of security
Check that the public key was created successfully
Copy the key to your remote server
Validate that the key was added successfully
SSH access configuration
Navigate to
/etc/ssh/sshd_configand within the file:Change 22 Port
Change port 22 to any non-default port: e.g.
Port 20155Disable Root logins
Set
#PermitRootLoginasnoPermitRootLogin noDisable empty passwords
Set
#PermitEmptyPasswordsasPermitEmptyPasswords noEnable Protocol 2
Add the line
Protocol 2to the file.Limit for password attends
Set
#MaxAuthTriestoMaxAuthTries 3or Disable password authentication altogether (Important -– Please make sure you already have SSH Key access before disabling it) — Set
#PasswordAuthenticationasPasswordAuthentication noNow, restart SSH service to apply our changes
Let's finally test our changes!
SSH into your server using your keys
Daniel Ratmiroff © - site made with: blogmaker - credit to Vitalik Buterin